Welcome to our "cute tute"!
Above is a small sampling of mini accordion books
The top pic has soft covers and the bottom have hard covers.

And these above are our long and skinny books.
They are hard cover and use simple binder paper for the pages
First we'll show you the very simple soft cover book
and then we'll show the hard cover.
I promise that it is easier than reading this tutorial.
It's one of those projects that is easier to do than to explain. :)

Here's a list of supplies for the simple mini books with soft covers:
Paper for cover (card stock is best for this)
Regular paper for pages
Glue stick and tacky glue
Ink pad in brown for antiquing edges of cover and pages (optional)
Corner punch (optional as well)
Paper cutter

Cut long strips of paper in size to suit you.
I think we cut our paper about 1 1/2 " to fit the alphabet stickers we were using on the pages
Remember, that you will cut vertical strips, but will be folding on the horizontal.
Paper can be cut horizontally if your paper pattern requires it.
You'll just have a little more gluing to do.
This will make sense I promise :)

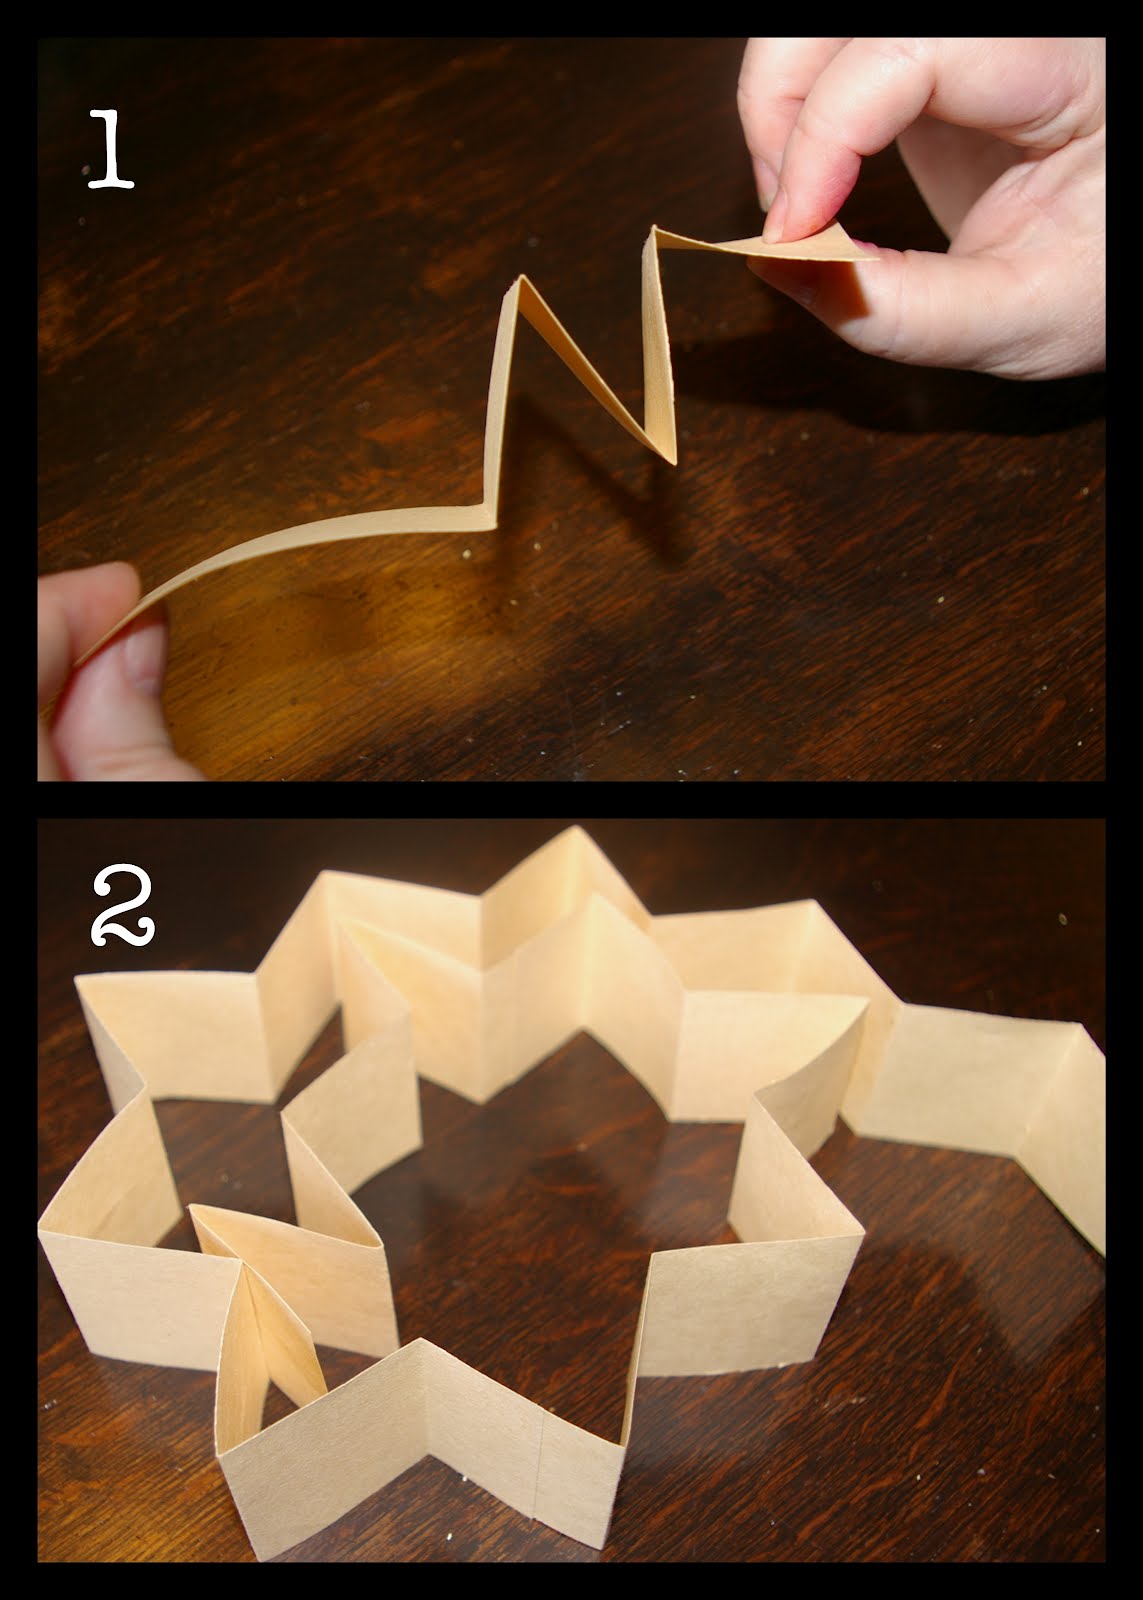
1)Start folding your strips of paper in a zig zag or accordion as shown.
2)glue one strip to another along the way until you get a long strip as shown
(glue as many strips of paper together as you need for the amount of pages you want)

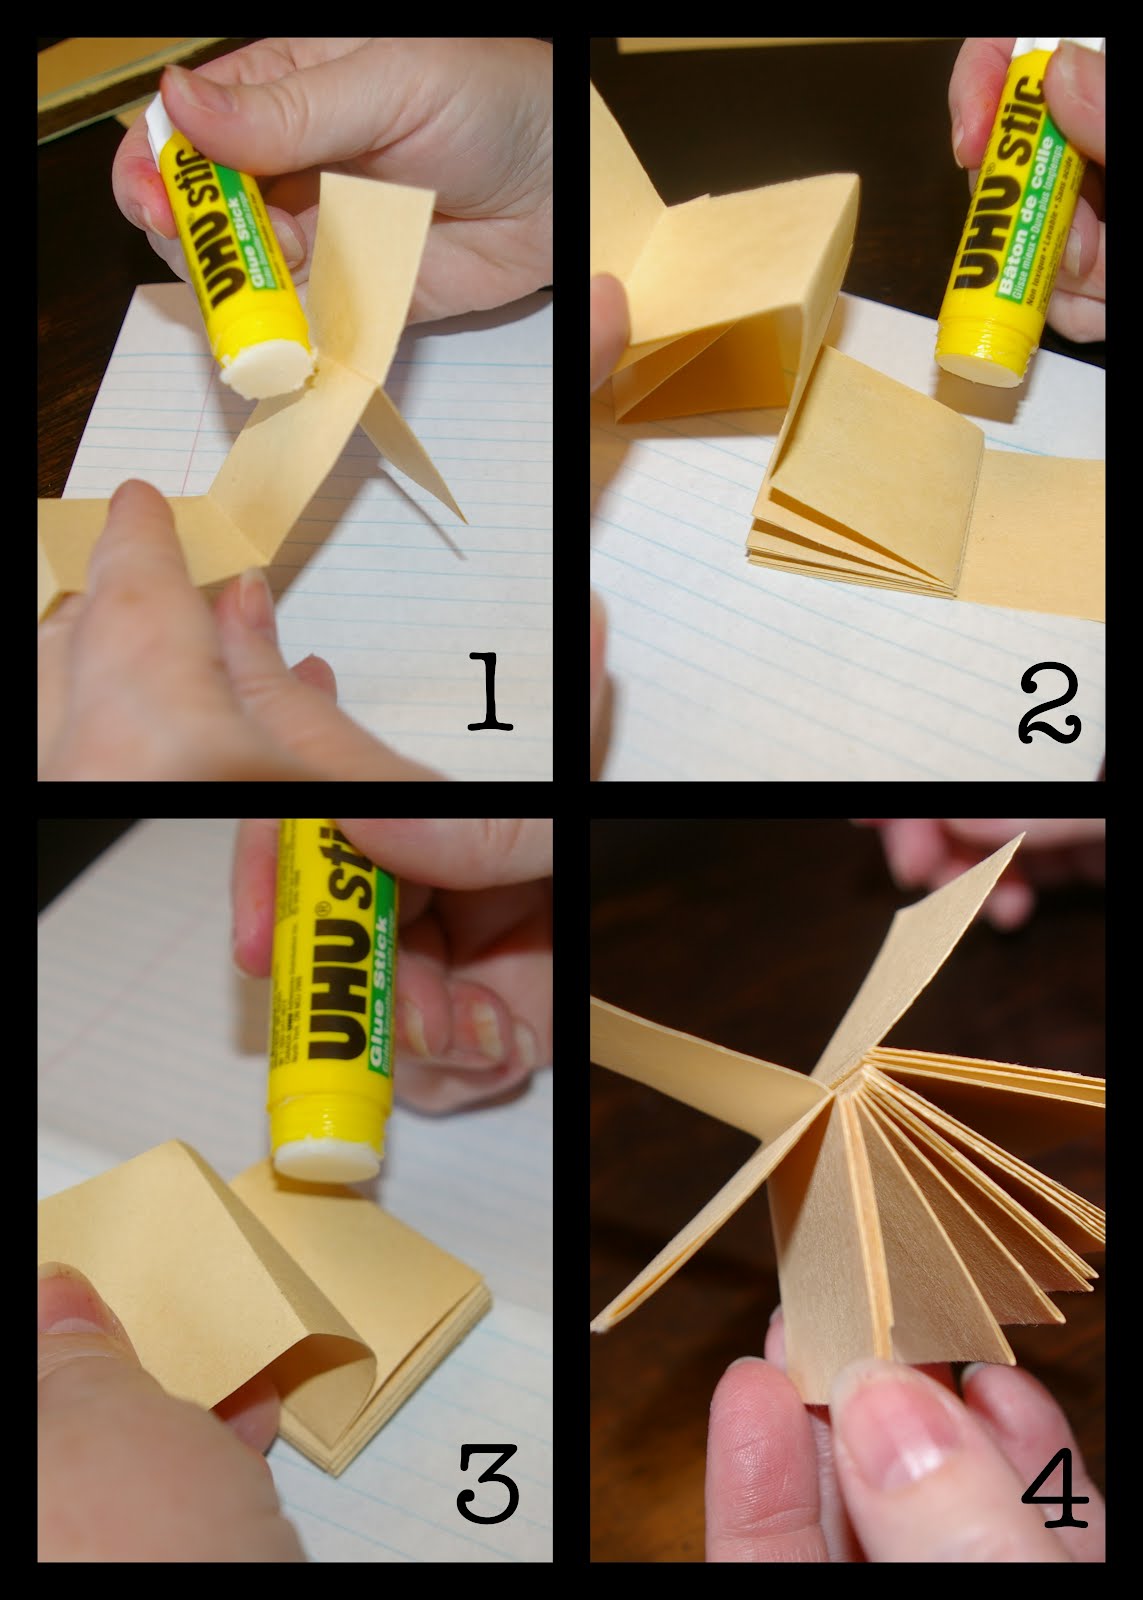
1)leave the first flap open so you can glue it to the cover when the time comes.
2) glue every other piece and fold down on top of each other.
3) I keep it stacked on top of each other. This helps me to remember which pages to glue.
4) When done you should have a "free flap" at the beginning and the end with the folded/glued pages in the middle.( it looks like a "book birdie"!)

1-4) if you want rounded page and cover edges, use the corner punch (pretty huh?)
5) Antique the edges by carelessly scraping the edges of your paper against an ink pad
6)Picture of carelessly inked edges

1-2) For this particular book we used alphabet stickers
and thought it best to carelessly scrape them across the ink pad as well.
3)See? It's starting to look like a cute little book!
We're almost done!
SOFT COVERED BOOKS

For the soft covered books, place your card stock face down
and measure the "guts" of your mini book.
1) place pages in the lower corner of card stock and measure front
2)then measure the "spine"
3)then add in the back
4) Mark the paper on the end and top
5) and then cut out your cover piece.
6) crop the corners with your corner punch
if you are using rounded corners on your pages.

Time to put the cover on!
1) glue the wrong side of your card stock cover
(I like to put a little "real glue like Elmer's
or other liquid craft glue just
on the spine for extra strength.)
2) Place the front flap onto the left gluey side of your cover paper.
Match up edges top and bottom.
Do the same for the other side.
3) Pinch the paper where the spine is to give it extra definition
4)If for some reason it doesn't match up perfectly,
you can always trim a little.
I usually have to.
5)Carelessly swipe that new little cover over that ink pad and....
6)Voila! you have your own cute little mini book!
The possibilities are endless.
You can make these books what ever size you want to.
We'll show this one decorated at the end.
NOW FOR THE HARD COVER
for cover: cardboard
masking tape
scissors
pretty scrap booking paper for cover
and another co-ordinating piece
for the 2 end covers.
glue stick and tacky glue

1) Cut three pieces of card board....
2- slightly larger than the size of your front cover
and 1- the size of your spine
( not really your spine, but the width of your pages glued together)
Make sure that the book "spine" is the
same height as the front and back cover pieces
2) use masking tape to "bind" the three pieces together
Start my cutting a strip of tape about 3 inches longer than your cover spine
Place the spine in the middle of the tape. It should have tape showing on either side of it.
That's where you add the front and back with a slight gap.
any extra tape on either end should just be pressed down on the other side
between the spine and the edges of the front and back covers.
( the gap helps the front and back covers to move easily)
3-4) See? Look how book cover-ish it looks already!
It's ok to make sure there's a nice bend as in # 4

1) lay your book cover on the back side of your cover paper
and add about 1/2 " on all 4 sides.
Mark and cut out
2) Glue your cover on one side and place on paper evenly,
so all sides have paper showing
3) Make snips at top and bottom aligning with your spine creases.
(this should equal 4 cuts.
This will help your covers to move with more ease)
4) cut corners at diagonal as shown
5-6) Glue down all paper "flaps"
You can either use a bone folder
or your nail to make sure the paper is
meeting the cardboard on all edges snugly.

1) Clip book cover corners.
(even though you are exposing the edge of the cardboard,
the antiquing covers it and you can not tell.)
2) You guessed it! Carelessly swipe those book cover edges over the ink pad!
3) Yea! Our cover mostly is done...now to attach it to the rest of the book
4)We will be making 2 "end papers"
to connect the cover to your "guts" or inside pages.
Mark the page size and double it plus a little, equalling one piece that will be glued first to the inside of your cover, and then to your outside flap. Repeat
It looks really pretty to make the end paper in a co-ordinating color or pattern.

1) After your paper is cut
( make sure you cut 2, one for the front and one for the back)
round the corners
2) Glue your end papers
( I like glue sticks for this)
( Remember to put a line of regular glue down the spine too)
First line up end paper with your front cover.
Since you cut your book cover slightly larger than your paper size, you should now have a little space on all three sided of your end paper.
Smooth it down, making sure that the end paper goes all the way to the spine,
and then with your "guts" lined up on the spine,
attach the other half of your end paper to the book pages (guts)
Repeat for back cover.
Don't feel bad if you have a little trimming to do.
3) Push pages in a little to make sure they are meeting the spine
4) there ya go! Good job!
HERE'S THE SOFT COVER DECORATED

AND HERE'S THE HARD COVER!
Thanks for visiting us.
We hope you'll have tons of fun making books of all sizes!